Why Sag Is the Silent Killer
Ideal sag in tensioned track system for rope rescue is not an easy thing to figure out. If you’ve ever stood under a loaded tensioned track line, you know the truth: it’s not the rope that fails first, it’s the anchors. They groan, creak, and sometimes shift under loads that no one expected. The reason is sag — or more precisely, the lack of it.
A line that looks tight is a line that is overstressed. This is one of the most misunderstood principles in rope rescue. Rescuers often equate “tighter” with “safer,” but the physics say the opposite. The correct sag angle is not just preference — it’s survival.
The Physics of Sag
A tensioned track is essentially a horizontal highline. Its anchors bear the majority of the stress, not the rope mid-span.
-
Leverage Effect: A flat rope increases the lever arm of force. Anchors act as pivots bearing amplified load.
-
Angle Effect: The smaller the sag angle (θ), the greater the force magnification.
-
Balance Point: At some sag, forces become manageable while clearance remains safe. That’s the sweet spot every team should aim for.
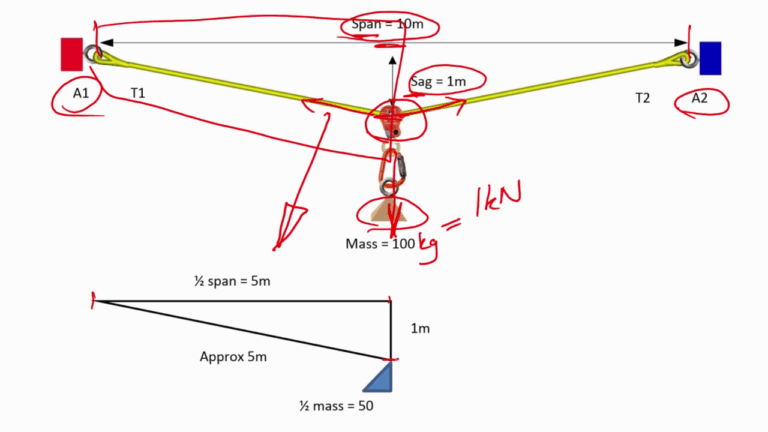
The Math Behind Anchor Forces
Anchor tension is governed by simple trigonometry:
T=W/2sinθT = \frac{W/2}{\sin \theta}T=sinθW/2
Where:
-
T = tension on each anchor leg
-
W = suspended load
-
θ = sag angle at mid-span from horizontal
Worked Examples: 200 lb Load
-
At 5° sag: sin5°=0.087\sin 5° = 0.087sin5°=0.087. T = 100 ÷ 0.087 ≈ 1,147 lb per anchor.
-
At 10° sag: sin10°=0.174\sin 10° = 0.174sin10°=0.174. T = 100 ÷ 0.174 ≈ 575 lb per anchor.
-
At 15° sag: sin15°=0.259\sin 15° = 0.259sin15°=0.259. T = 100 ÷ 0.259 ≈ 386 lb per anchor.
-
At 20° sag: sin20°=0.342\sin 20° = 0.342sin20°=0.342. T = 100 ÷ 0.342 ≈ 292 lb per anchor.
Force Multiplication Table
| Sag Angle (θ) | Anchor Force (200 lb Load) | Force Multiplier |
|---|---|---|
| 5° | 1,147 lb | 5.7× |
| 10° | 575 lb | 2.9× |
| 15° | 386 lb | 1.9× |
| 20° | 292 lb | 1.5× |
The table says it all: the difference between 5° and 15° is the difference between anchors failing and anchors holding.
The 10–15° Rule: Backed by Field and Math
-
Rigging Lab Academy guidance: “Allow at least 10% sag” (≈11.3°) in horizontal systems. This is the practical baseline.
-
RopeLab analysis: Shows how tension spikes exponentially as angles decrease below ~10°.
-
Field operations: Multiple rescue teams have confirmed through testing that 10–15° is the working range.
This range is the proven balance point:
-
Low enough tension to protect anchors
-
High enough clearance to keep loads safe
-
Realistic to achieve with standard 3:1 or 5:1 tensioning systems
Field Application: Step by Step
1. Select Strong Anchors
-
Anticipate 2–3× the expected load.
-
Always build redundancy into your anchor plan.
2. Rope Choice
-
11 mm low-stretch rope is standard for tracks.
-
Dynamic rope introduces bounce, sag creep, and energy you don’t want.
3. Build Sag into Setup
-
Aim for visible sag at mid-span. If the line looks flat, it’s unsafe.
-
A quick field rule: if you can see daylight between rope and straight-line sight, you’re near the right range.
4. Control with MA and PCD
-
Tension with a 3:1 or 5:1 haul system.
-
Lock off with a progress capture device (PCD) to prevent creep.
5. Confirm Under Load
-
Load the line gradually with the litter.
-
Check sag again. Rope stretch often increases sag slightly.
-
Measure forces with a dynamometer when possible — don’t trust “feel.”
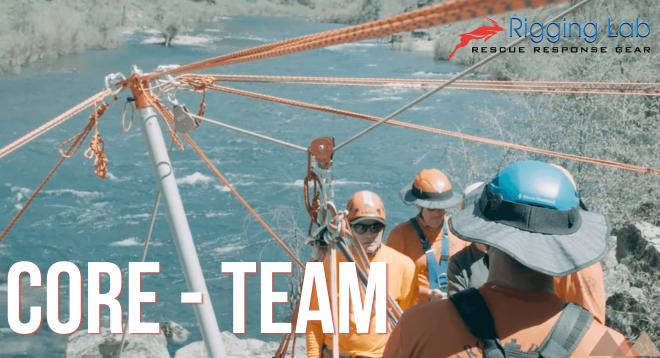
Training Story: Canyon Crossing Gone Wrong
During a training exercise across a 100-foot canyon, the team rigged a track with ~7° sag. When they loaded a 180 lb dummy and an attendant, the 4,000 lb-rated tripod anchor at one side shifted dangerously. Testing later showed each anchor was experiencing over 1,000 lb of force.
The lesson? A few degrees of sag nearly destroyed an anchor system that should have had plenty of margin. After adjusting to 14° sag, the forces dropped to under 400 lb per anchor — and the rescue completed safely.
Training Drills to Build Sag Awareness
-
Force Drill: Rig tracks at 5°, 10°, 15°, 20° and measure anchor tension with a load cell. See the exponential increase firsthand.
-
Clearance Drill: Place a litter at mid-span over terrain with different sag values. Show how clearance disappears past 20°.
-
Visual Estimation Drill: Train rescuers to “eyeball” 10–15° by sighting lines and comparing against protractors.
Key Takeaways for Rescuers
-
Sag is not optional — it defines whether anchors survive.
-
A flat line is a dangerous line.
-
Aim for 10–15° sag as standard operating practice.
-
Validate your systems in training before relying on them in the field.
Appendix: Proof and References
-
RLA Guidance: “Pre-tension… allowing at least 10% sag to manage forces effectively” (Basic Highline System).
-
RLA Case Note: “Sag = less force on both ends of the highline.”
-
RLA Warning: Over-tensioning risks — “fine line between sag and stress.”
-
RopeLab Technical: 10% sag ≈ 11.3°; formula T=(W/2)/sinθT = (W/2)/\sin θT=(W/2)/sinθ.
Peace on your Days
Lance