
General Guidelines to a Successful Operation of the Arizona Vortex
Excerpt From The Arizona Vortex Guidebook – A Rigging Lab Academy Premiere Course
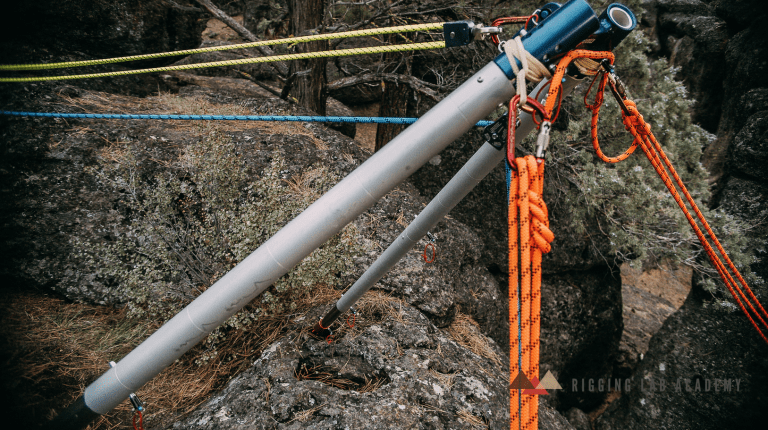
Operating the Arizona Vortex successfully demands an understanding of the forces at play and a disciplined approach to setup and execution. The safety and reliability of the Vortex depend on resisting all applied forces without any movement of the frame or associated equipment. Below is a comprehensive guideline to ensure operational success.
Key Recommendations for Setup
Training First
Always conduct training for the assembly and use of the Arizona Vortex in a controlled and safe environment. Participants must focus entirely on the relevant tasks to build confidence and proficiency. This training reduces errors during live operations and builds a solid foundation for future applications.
Initial Setup
Whenever feasible, assemble the Vortex away from the fall hazard zone. Once built, carefully move the frame to the edge. During this process, take precautions to prevent accidental toppling. This can include:
- Securing a tether cord to the Vortex head or legs.
- Placing the frame on belay while positioning it at the edge.
Step-by-Step Operational Guidelines
Step 1: Identify the Mode of Use
The Arizona Vortex can operate in two primary modes:
- Anchor Frame: The load’s supporting rope terminates directly on the Vortex.
- Directional Frame: The rope supporting the load is redirected through a pulley on the Vortex but does not terminate on it.
Step 2: Determine the Applied Force
Consider the magnitude and direction of all forces acting on the frame. Evaluate both planned movements of the load and any foreseeable unplanned movements.
Step 3: Assess Movement Tendencies
Understand that the Vortex’s head and feet may shift under load if not properly secured. Plan accordingly.
Step 4: Secure the Feet and Head
- Feet Securing: Prevent all movement by securing the Vortex’s feet.
- Head Securing: Use guy lines to stabilize the frame’s head. Proper guying provides the strength and rigidity necessary for safe operations.
Step 5: Confirm Guy Angles
Guy lines must adhere to these critical angles:
- Maintain angles of at least 30°.
- Ensure angles exceed the applied force’s direction.
Step 6: Test Load Stability
Before committing personnel to the system, test the rigging under controlled conditions. Apply load to the system in a safe environment to verify frame stability and security.
Related Resources for Arizona Vortex Operations
- Understanding Arizona Vortex Configurations
- Building Effective AHD Systems
- Guying Techniques for High Directionals
- Managing Edge Transitions with AHDs
- Two-Tension Rope Systems Explained
Conclusion
The Arizona Vortex is an invaluable tool in rope rescue and rigging systems, but its effectiveness depends on proper setup and operation. By following these guidelines and leveraging the resources above, teams can maximize the safety and efficiency of their operations.
Peace on your Days
Lance


Comments are closed.