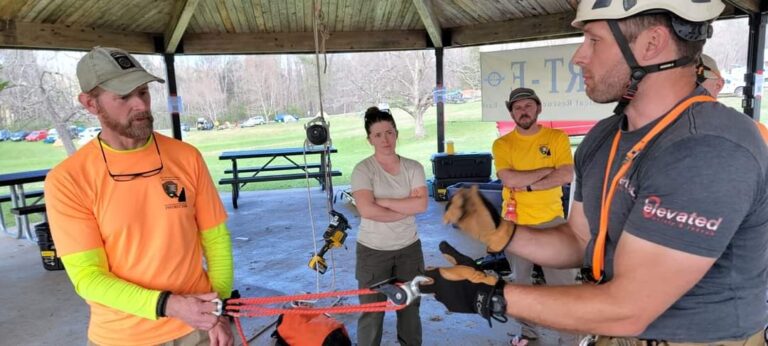
I received several similar requests for ingredients of a "Basic Ropes Class"...
Rope rescue demands clarity, discipline, and a layered approach to learning. Skills cannot be rushed, and they cannot be learned out of order. Each step builds the next, and each concept strengthens the rescuer’s ability to operate under tension and uncertainty. This three-day progression is designed to move a new team member from basic awareness to reliable operational capability. The approach is practical: build individuals first, then systems, then full rescue evolutions. By the end, students won’t just know the techniques—they’ll understand the logic behind them and operate with confidence in real environments.
Basic Rope Rescue Operations – A 3-Day Training Progression
Rope rescue is built in layers. You cannot shortcut the fundamentals, and you cannot jump ahead to systems without first establishing the discipline that makes those systems safe. This three-day progression reflects that reality. We build individuals first, then systems, then operations. The goal is to turn new rescuers into predictable, capable teammates who understand their equipment, communicate clearly, and operate with intention.
The structure is simple and intentional:
-
Day 1: Personal skills and equipment fluency
-
Day 2: Anchors and mechanical advantage
-
Day 3: Integrated operations and patient movement

1.0 Day 1 – Fundamentals of Equipment and Rigging Language
1.1 Morning Session – Gear, Rope, and Knot Craft
Why This First Step Matters
Rope rescue only works when the entire team shares the same vocabulary and the same mental model of how equipment behaves. This first session lays that foundation. Before approaching an edge or tying into a system, rescuers must understand what each tool does, why specific knots are chosen, and how load paths move through hardware. Without that clarity, communication breaks down and mistakes multiply.
The morning is designed to make the equipment logical. Instead of memorizing knots or hardware names, students learn why those tools exist and where they fit into the broader rescue system. Everything becomes easier when the fundamentals actually make sense.
Key Takeaways:
-
Establish a shared operational vocabulary
-
Understand rope types, construction, and behavior under load
-
Learn connector shapes and why orientation matters
-
Introduce core rescue knots and their purpose
-
Set expectations for consistency and clarity across the team
1.2 Afternoon Session – Hands-On Skill Development
When Knowledge Becomes Real Competence
The afternoon turns the morning’s understanding into dependable physical skill. Rope rescue is tactile. You cannot “think” your way into proficiency — you must tie knots until they are clean, repeatable, and correct under pressure. You must handle the rope until the movement feels natural. You must inspect equipment until the checklist becomes instinct.
This block is where habits form. Students see what they do well and where they struggle. They learn to correct sloppy rope handling, tighten up knot discipline, and develop the confidence needed for Day 2’s system-building.
Hands-On Goals:
-
Perform standardized PPE and hardware inspections
-
Tie, dress, and verify core knots repeatedly
-
Practice rope bagging and deployment techniques
-
Eliminate inefficient handling habits early
-
Build rhythm and consistency in basic rescuer tasks
2.0 Day 2 – Anchor Systems and Mechanical Advantage
2.1 Morning Session – Anchor Thinking and Force Principles
Understanding What Actually Holds the System Together
Anchors seem simple until you start loading them. This morning session gives students the mental framework needed to evaluate anchors with professional discipline rather than casual intuition. They learn to separate “this looks strong” from “this is truly appropriate for life safety.” The ERNEST framework becomes their decision-making lens.
Then we introduce force principles — again, not as math but as practical reality. Students see how angles multiply forces, how friction steals mechanical advantage, and why textbook values rarely match field performance. Understanding these truths prevents dangerous assumptions when building systems later in the day.
Anchor & Force Fundamentals:
-
Identify natural, structural, and artificial anchors
-
Apply ERNEST as a rapid evaluation tool
-
Understand load paths and resulting forces
-
Distinguish theoretical MA from practical MA
-
Know when and why to select a 3:1 Z-Rig
2.2 Afternoon Session – Building and Operating Real Systems
Turning Concepts Into Safe, Functional Rigging
The afternoon is where theory becomes systems. Students choose real anchors in real terrain, build multi-point setups, and construct mechanical advantage systems that actually move loads. This is where the classroom information suddenly becomes obvious — angles matter, alignment matters, rope routing matters.
Operating a 3:1 under light load teaches more than any lecture. Students see friction reduce efficiency, feel prusiks creep when misloaded, and understand how small rigging mistakes compound into operational problems. These lessons are the backbone of rescue rigging.
Afternoon Objectives:
-
Select anchors under realistic environmental constraints.
-
Build clean, redundant multi-point anchor systems
-
Construct and operate a functional 3:1 MA system
-
Diagnose and correct common rigging errors
-
Practice team communication and controlled movement
3.0 Day 3 – Integrated Systems, Patient Care, and Operational Control
3.1 Morning Session – Dual-Rope Systems and Patient Management
Bringing Safety, Redundancy, and Patient Needs Together
Day 3 connects the dots. Now the focus is on system redundancy and patient care — the two non-negotiables of real rescue work. The dual-rope system philosophy teaches students why we never rely on a single line and how mainline and belay systems work together. The introduction of TTRS demonstrates how modern teams create smooth, controlled movement with shared tension.
We then shift to the patient. Packaging, stabilization, tie-ins, and litter control are taught with a focus on preventing further injury. Students begin to understand that technical rescue is never just about ropes — it’s about protecting a person through movement.
Core Competencies:
-
Understand mainline + belay roles and responsibilities
-
Learn the fundamentals of TTRS load sharing
-
Perform rappelling and edge transitions safely
-
Package and secure a patient for transport
-
Build confidence in patient-centric decision-making
3.2 Afternoon Session – Integrated Rescue Scenarios
Where the Entire Course Comes Together
The final block integrates everything — anchors, mechanical advantage, dual-rope control, edge transitions, and patient packaging — into one cohesive rescue evolution. Students are assigned roles, build systems from scratch, and execute a complete lower-and-raise operation with a loaded litter.
This is where the rescuer’s mindset solidifies. They learn to communicate under pressure, correct errors on the fly, and maintain safety discipline while managing a real load. The scenario reinforces that rope rescue is team-driven — individual skills matter, but coordinated execution is what brings a patient home safely.
Scenario Expectations:
-
Build full mainline and belay/TTRS systems
-
Package a patient and secure them to a litter
-
Perform controlled lowering with dual-rope coordination
-
Convert to a haul and raise the system cleanly
-
Demonstrate full-team communication and safety discipline
Summary
This three-day progression delivers what every rope rescue team needs: disciplined fundamentals, strong system awareness, and the ability to operate as a coordinated unit under load. Students leave with more than technical knowledge — they go with habits, patterns, and clarity that translate directly into safer real-world operations.
They understand their equipment.
They understand their systems.
And most importantly, they understand how to function as part of a team when it matters.
Peace on your Days
Lance