
This piece is from the RLA course Highline Sections with Tom Woods
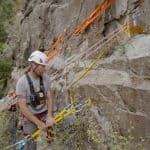
What we’re going to look at next is the actual anchoring system for the Highline that we’ve just done. It’s a little bit unique setup in that we’ve done all of our anchoring for everything off of removable bolts. Given the area where we’re working as a fairly popular climbing area, we were concerned about leaving any bolts behind, boat hangers that could either be chopped or maybe when we need them for a rescue. Somebody removed them. And aesthetically of course you know you just don’t want to litter up a canyon with a bunch of shiny steel objects. So what we’ve done is we’ve set up our track line system, our tagline system, our belay system, completely using removable boat anchors from PMI because we’re pre planning this rescue. My rescue team, the Alpine Rescue team has worked with the Clear Creek fire authority and clear Creek EMS several times over the last few years doing evacuations of injured climbers here.
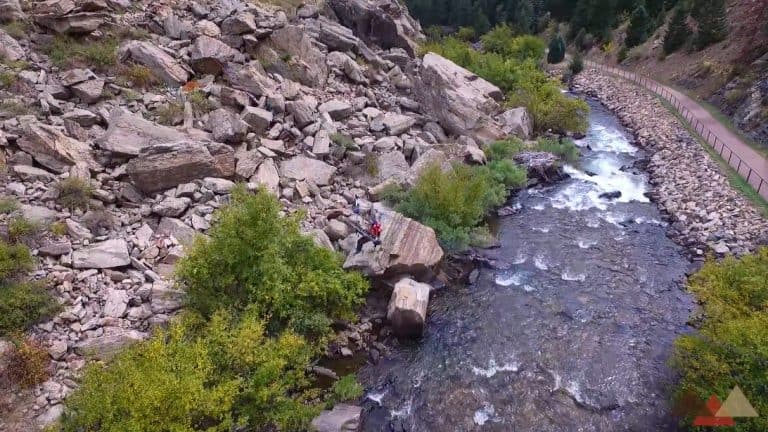
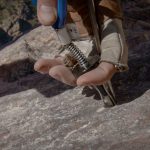
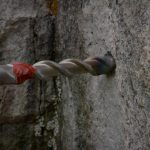
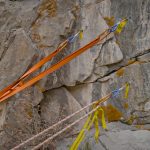
The reason why we’ve opted for a Highline is that the trail out is above some class four rapids. We’re trying to stay out of that danger zone and give the patient a smoother ride. So that’s kind of the big picture of why we’re here. But talking about the anchors in specifically, these are three quarter inch holes from RB with RB specs that put each anchor at 310 pounds. So obviously we want to make sure that we don’t exceed the manufacturer’s recommendations for the bolts. And what we’ve done is we’ve loaded shared everything. So no one single bolt is holding a high load. We’re sharing the load. So that meant that we had to orient our, our lines in advance, make sure that once everything was under tension that it was equally weighted. So these are three quarter inch. They do require a three quarter inch hole.
Typically, they want to see the tear drill in these a inch and a half, two inches. I usually drill just a little bit more in case you’re not able to blow it out and clean it well with the impaction it can be difficult to remove these. So we went a little bit deeper. You also noticed that we tried to stay at least six inches away from any cracks, corners or anything like that. That would be suspect. We did sound out these rocks to make sure that we weren’t drilling into a flake. These are solid pieces of granite. It was a lot of work to drill them. So I can attest to the fact that they’re solid. Granted. And what we’ve also done is with our pre planning, we’ve decided where we wanted everything. So our belay lines are where we could reach them. We knew that for the track lines we may not have to reach them quite as often.
[thrive_leads id=’53879′]
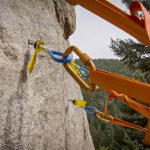
So we’ve gone a bit higher up with those. Our tensioning system is kind of in the middle here and you’ll see the places where we expected to see the highest amount of force are the places where we’ve load shared the most anchor points. So for our track lines there, which typically see a high load, we’ve load shared for independent points to create one master point for the track lines. So with the RB’s, the beauty of them is they are removable. So, when we finish up our operation here, we’ll be able to take a screwdriver and a hammer and gently tap the spoon here. It releases the cam and then we’re able to back these out. So the nice thing is we don’t leave behind any metal. And then if we were so inclined we could shoot some quick crete into these holes and or pack them full of dirt or dust and they’d be almost invisible to the naked eye.
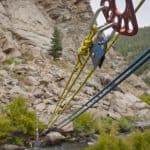
So much less obnoxious or intrusive than bolt hangers everywhere. So, that’s kind of the system that we went with. Given the parameters of where we’re working. We also opted to have our anchor points a lot higher than normal because as you know with a high line you want to make sure that you can operate with the most amount of sag as possible. That limits the amount of force on both sides of your anchors for your track lines. So the creek is actually below us and our anchor point where the subject would be evacuated from is actually quite a bit higher than where we are here on the control side. So the far side anchors are good, bit higher than we have here. Beauty of that is they spend most of their time lowering. We take in a little but we limit the amount of force on our anchors here by having a lot of built in sag.
So we’re not so concerned about dropping the patient into the creek or ropes dragging through the creek. So that’s why we opted for a lot higher area. Also, they’re out of view of the public. Most folks don’t come up here. This is not a climbing area where we’re at here, but it’s a great straight shot across to our far side anchors. So that’s where the nuts and bolts lie with our anchors here. They’re removable and highly rated for what we’re doing. So kind of a unique system and we’re hoping that eventually this is going to make it a quicker evacuation so we can actually save a life.

Peace on your Days…
Lance


12 thoughts on “Highline Anchors Featuring Removable Bolts”
627880 42758I actually dont accept this certain article. Nonetheless, I had searched with Google and Ive discovered out that you are proper and I had been thinking within the improper way. Keep on creating top quality material comparable to this. 599202
242589 896660Wonderful post, I conceive site owners ought to learn a good deal from this internet weblog its rattling user genial . 861025
249689 592584Paper rolls quite wonderful read you know alot about this subject i see! 895136
438350 424902I saw a lot of site but I think this one contains something unique in it in it 293183
417981 565959You created some good points there. I did a search on the subject and identified many people will agree with your blog. 935127
stromectol for covid Discount Doxycycline Acne
I cling on to listening to the reports speak about receiving free online grant applications so I have been looking around for the top site to get one. Could you tell me please, where could i acquire some?
I think you have noted some very interesting points, thanks for the post.
125221 149478Some really intriguing information , well written and broadly speaking user pleasant. 737462
Simply a smiling visitor here to share the love (:, btw great style and design.
304779 239798Glad to be one of several visitants on this amazing web site : D. 706474
55257 718819There is noticeably a bundle to realize about this. I assume you produced various nice points in functions also. 546924
Comments are closed.