
The Arizona Vortex Tripod: A Versatile High-Directional Solution
The Arizona Vortex, known for its versatility and adaptability in technical rescue scenarios, offers multiple configurations to meet the demands of varied environments. Among these, the tripod configuration stands out as a fundamental setup for confined space entry and rescue operations. This guide delves into the step-by-step process of assembling the Arizona Vortex in its tripod configuration and highlights its practical applications.
Building the Arizona Vortex Tripod Configuration
1. Preparing the Vortex Components
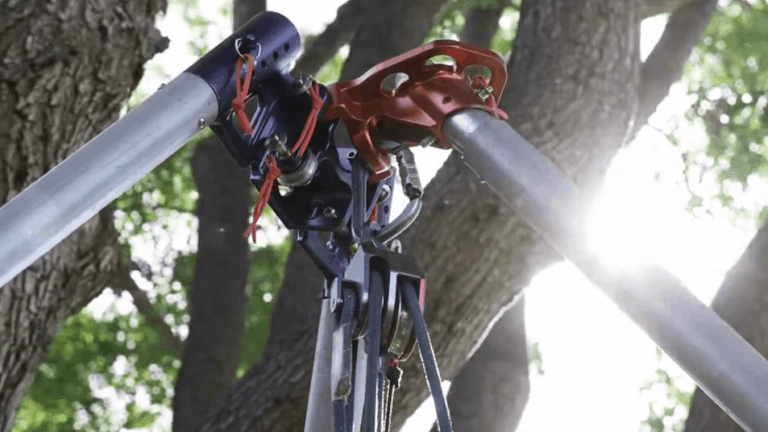
The Arizona Vortex is designed with portability in mind, packaged in four bags for easy transport across rugged terrain. Assembly begins with constructing the head of the tripod:
- Combine the A-frame joiner (blue component) with a monopod (orange piece) to create the head for the tripod’s three legs.
- Secure the connection using the half-inch pin, rated at 32,000 pounds, ensuring a solid and safe structure.
2. Assembling the Tripod Legs
The legs of the tripod are critical for stability and height adjustment:
- Insert an outer leg into one of the three indexed slots on the head of the Vortex.
- Secure the leg with a three-eighths-inch pin, rated at 18,000 pounds.
- For additional height, attach an inner leg to the outer leg, ensuring proper alignment with the caution line marked for maximum height.
3. Adding Stability with Feet and Hobble Straps
The Vortex tripod gains ground stability through its unique foot design and hobble straps:
- Attach Raptor feet, which feature carbide tips for optimal traction on uneven surfaces. The tips can be rotated for fresh points, ensuring long-term reliability.
- Install hobble straps to prevent leg splaying when the system is loaded under compression.
Practical Applications: From Centered to Offset Portals
The Arizona Vortex tripod adapts seamlessly to various confined space entry scenarios:
- Centered Entry: In its standard configuration, the tripod positions its high directional over a centered portal, ideal for vertical entry into confined spaces such as manholes.
- Offset Entry: For portals that are not centered beneath the tripod, the easel configuration comes into play. This involves adjusting the leg arrangement and incorporating tools like the Harken winch for precision alignment.
Key Features and Benefits of the Tripod Configuration
- Strength and Durability: Rated pins and components ensure the tripod can handle substantial loads safely.
- Adaptability: Modular design allows for adjustments to meet specific environmental challenges.
- Ease of Use: Pre-rigged systems, like the CSR2 4:1 pulley, simplify rigging and minimize setup time.
- Enhanced Safety: Features such as hobble straps and pre-extended hauling systems improve operational safety.
Conclusion: Why Choose the Arizona Vortex Tripod?
The Arizona Vortex tripod configuration offers unmatched flexibility, durability, and safety for confined space and rescue operations. Whether working with a centered or offset portal, this system ensures efficiency and reliability, making it an essential tool for any technical rescue team.
Discover More:
Peace on your Days,
Lance

Comments are closed.