Setting Up a High Directional with the A-Frame
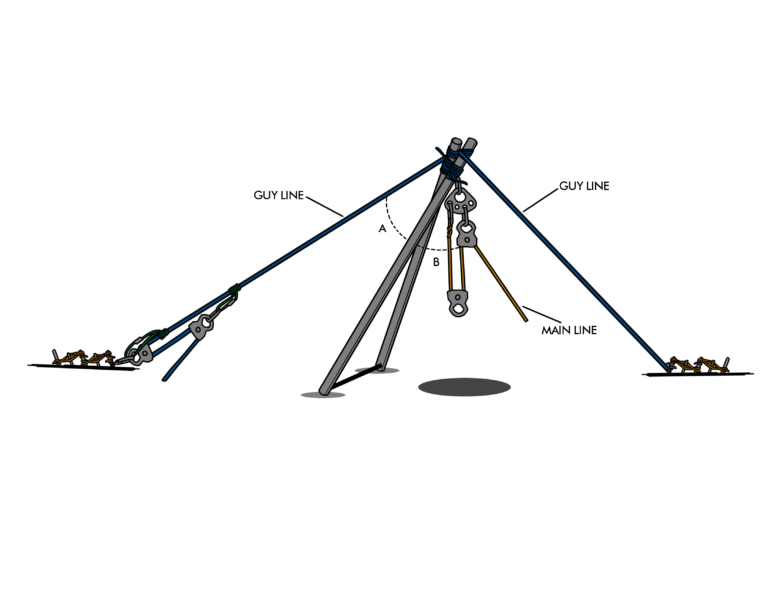
- Position the A-Frame:
- Place the A-Frame so that the apex is directly above the area where the load will be managed. Ensure it is oriented to best accommodate the direction of the load and rope angles.
- Install the Anchor System:
- Secure the main anchor line at the apex of the A-Frame. This line will bear the primary load, so ensure it is robust and properly attached.
- Use additional anchors as necessary to distribute the load evenly and enhance the system’s overall safety.
- Attach Pulleys and Ropes:
- Install pulleys at the apex to guide the ropes used for lifting or lowering loads. Ensure that pulleys are compatible with the ropes and can handle the expected forces.
- Set Up Load Management Systems:
- Implement load-managing devices such as progress capture devices or descent control devices, depending on the operation’s nature (e.g., rescue, material handling).
- Safety Checks and Adjustments:
- Conduct thorough safety checks to ensure all components are securely attached and functioning as expected. Pay special attention to the load paths and ensure that all forces are directed appropriately to maintain the structure’s integrity.
- Conduct a Dry Run:
- Perform a trial run without a critical load to observe the behavior of the entire system. Adjust the guy lines, anchor points, and other components as necessary based on this test.
By carefully following these steps, you can effectively construct and utilize an improvised A-Frame as a high directional for various applications, ensuring that it is both safe and functional for the intended tasks.
To construct an improvised A-Frame, begin by selecting strong and straight materials such as wood, bamboo, or metal poles, choosing based on both availability and the environmental conditions. Next, prepare these spars by stripping them of any branches, leaves, or protrusions to ensure they are smooth and roughly the same length, which is crucial for stability.
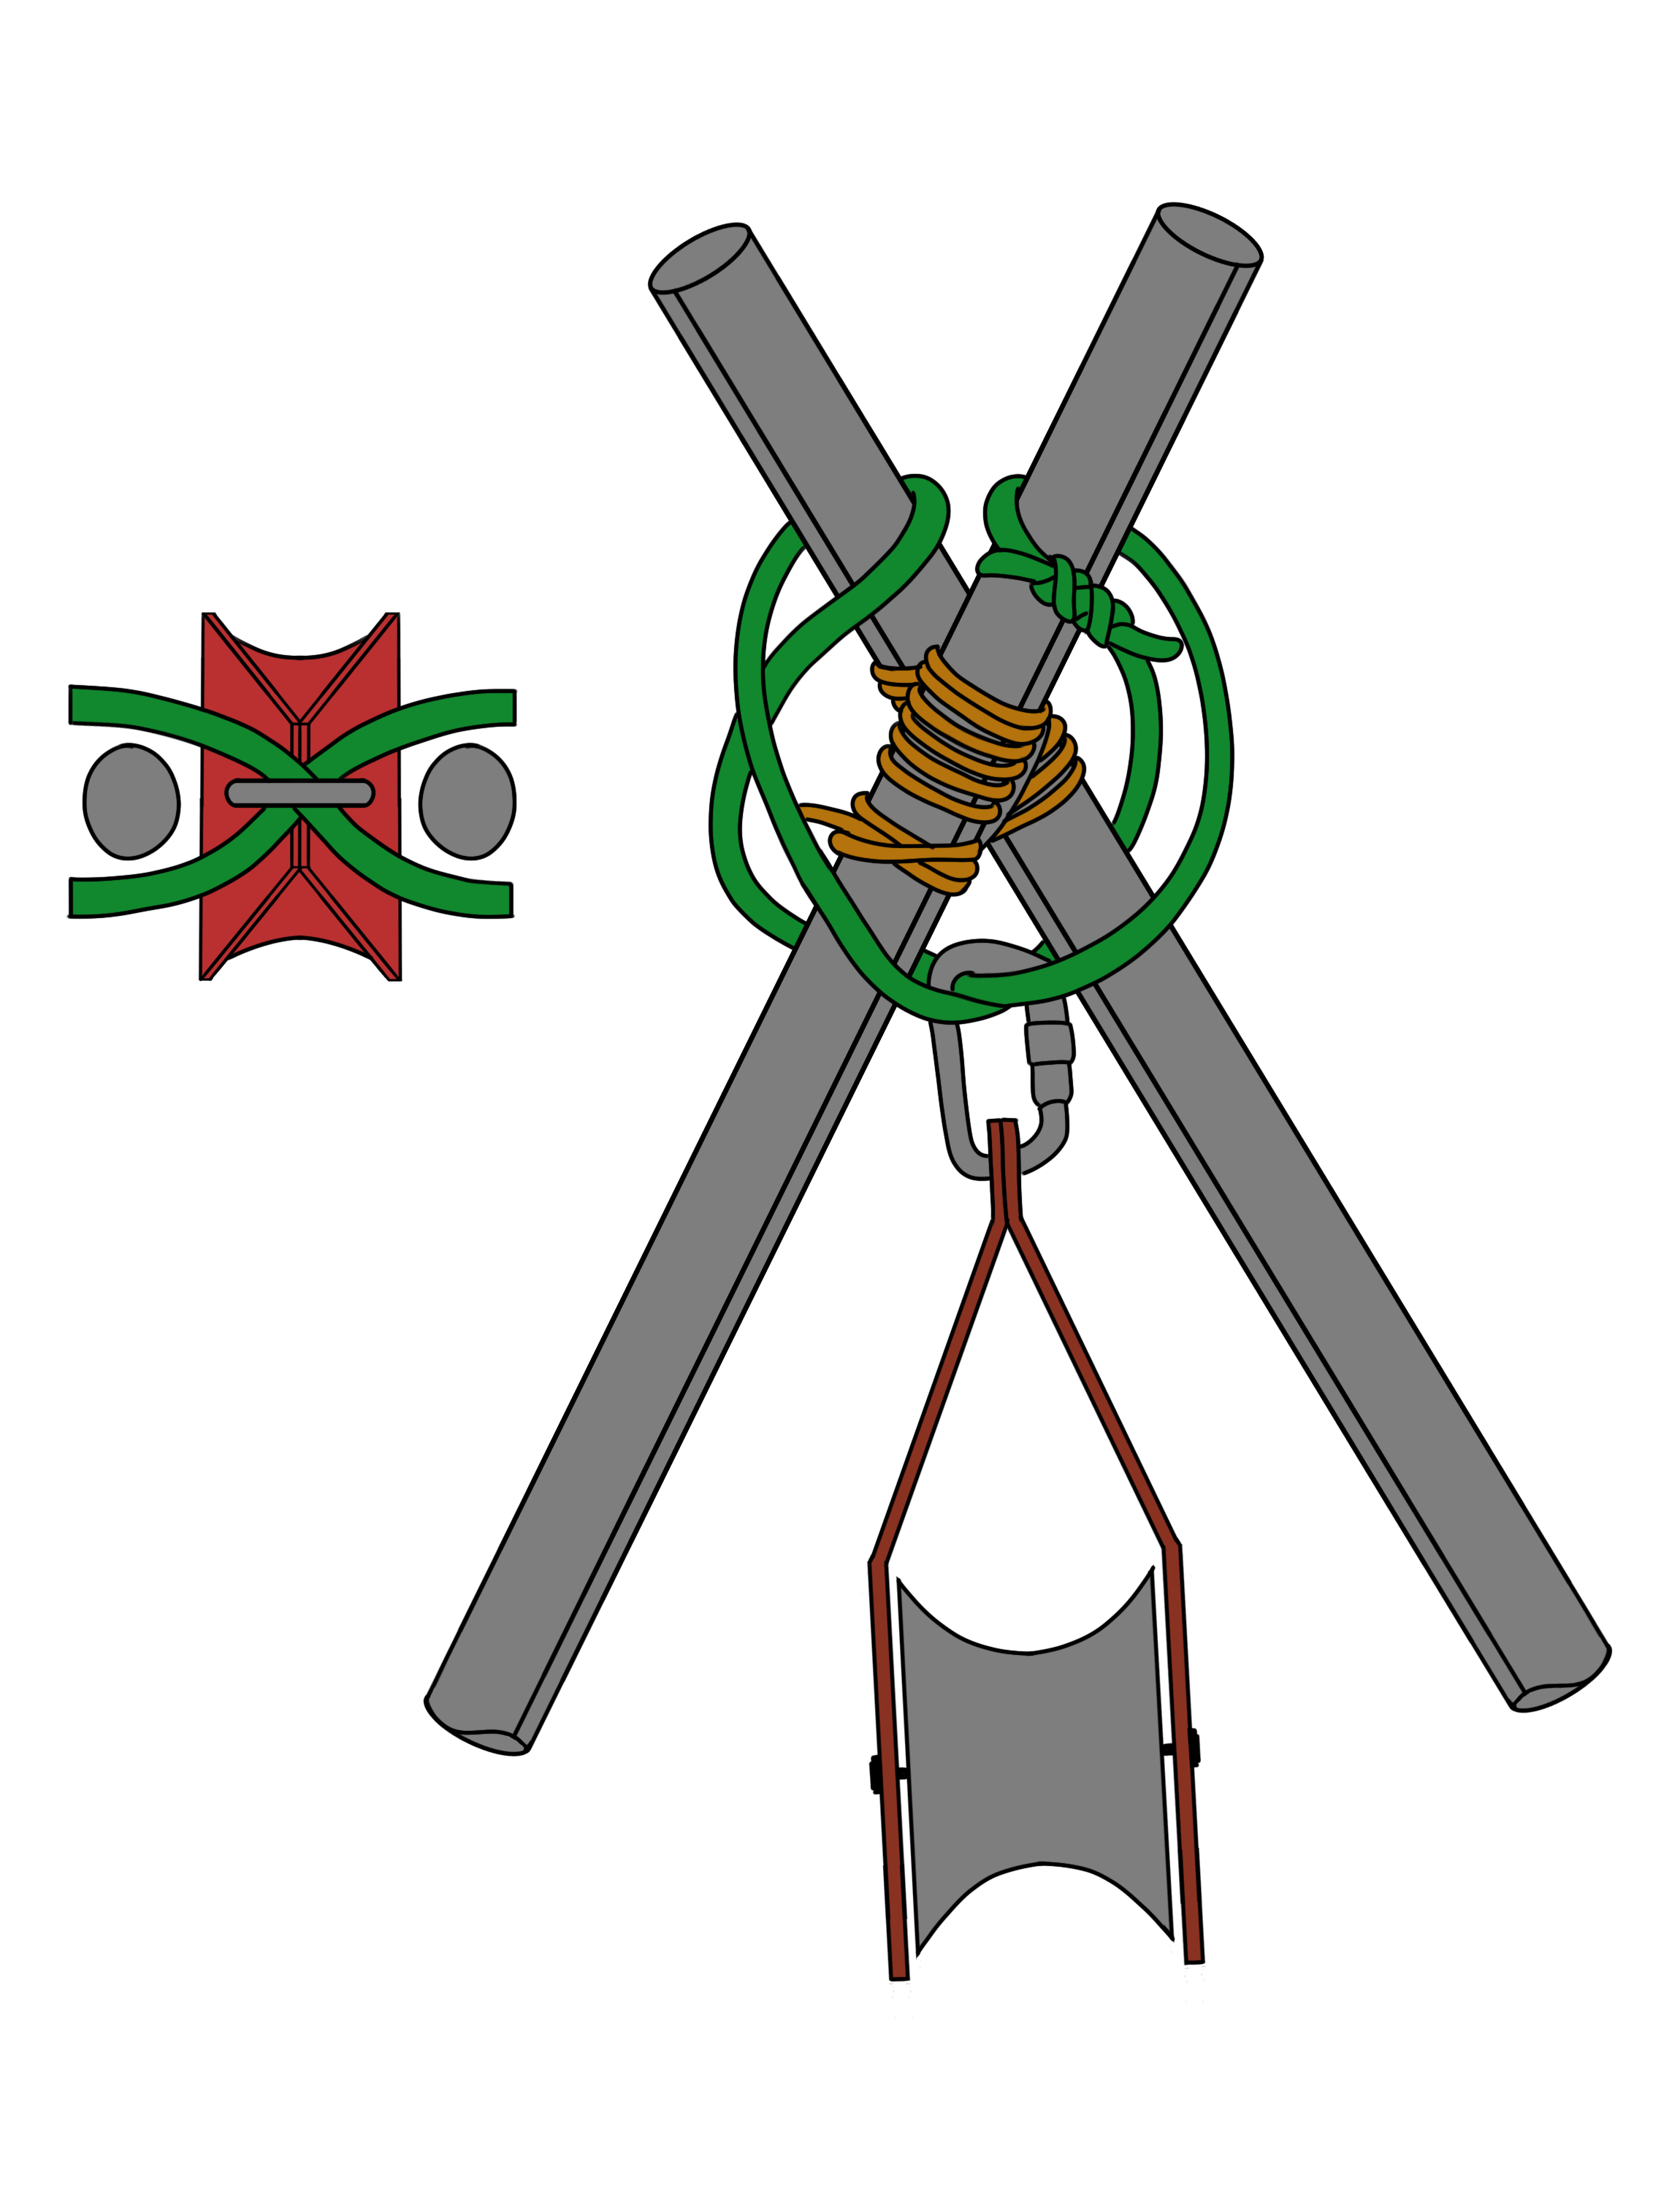
Once the spars are prepared, lash them together at one end to form the apex of the A-Frame using techniques like spar lashing or round lashing. It’s important that the lashing is tight but still allows the poles to pivot slightly for necessary angle adjustments. Then, set the base by spreading the poles’ free ends on the ground. The distance between the poles at the base is critical, as it influences the overall stability of the structure and should be adjusted based on the anticipated load and required height.
For added stability, especially if the A-Frame needs to support a heavier load or span a greater area, attach horizontal cross braces between the poles using square lashings. Finally, secure the structure with guy lines about one-third of the way down from the apex, anchoring them into the ground or other stable structures. Adjust the tension in these lines to ensure the frame maintains its upright position.
Before putting the A-Frame to use, test it by carefully applying a light load to check for stability. Adjust the base spread, tighten or loosen the tension in the guy lines as needed, and inspect all lashings for any slippage or movement to ensure the structure is safe and reliable for use.
Constructing an improvised A-Frame and setting it up as a high directional involves meticulous planning and execution to ensure safety and functionality. Here’s a step-by-step guide to both processes:
Constructing the Improvised A-Frame
- Select Suitable Materials:
- Choose strong, straight poles or spars. Ideal materials include wood, bamboo, or metal poles, depending on availability and environmental conditions.
- Prepare the Spars:
- Remove any branches, leaves, or protrusions to smooth out the poles. Ensure they are roughly the same length for stability.
- Lash the Spars at the Top:
- Position the poles together at one end to form the top of the A-Frame.
- Use spar lashing or round lashing to securely bind the poles at this joint. Ensure the lashing is tight and allows the poles to pivot slightly for angle adjustments.
- Set the Base:
- Spread the free ends of the poles on the ground to create the base of the A-Frame. The distance between the poles at the base will affect the structure’s stability and should be adjusted based on the load and the required height.
- Stabilize with Cross Braces (if necessary):
- For additional stability, attach horizontal cross braces between the poles using square lashings. This step is crucial if the A-Frame needs to support a heavier load or span a wider area.
- Secure with Guy Lines:
- Attach guy lines about one-third of the way down from the apex of the A-Frame. Anchor these lines securely into the ground or other stable structures, adjusting the tension to maintain the frame’s upright position.
- Test the Structure:
- Carefully apply a light load to test the stability of the A-Frame. Adjust the base spread, the tension in the guy lines, and check all lashings for any slippage or movement.
Peace on your Days
Lance