Simplifying the V Anchor for Rappelling
Anchoring forms the foundation of all rope systems, whether for climbing, rescue, or recreational activities. Richard Delaney from Rope Lab, in collaboration with Rigging Lab at Rescue Response Gear, demonstrates how to set up a V anchor for rappelling. This guide simplifies the process, highlighting key steps and safety considerations to create a reliable, fail-safe anchor system.
1. Why Use a V Anchor?
The V anchor is an adaptable and robust system that connects multiple anchor points into a single focal point. Its key benefits include:
- Redundancy: Eliminates single points of failure.
- Versatility: Can be applied in various rope activities, such as rappelling or belaying.
- Simplicity: Uses straightforward techniques and gear.
2. Selecting Anchor Points
The first step in setting up a V anchor is deciding where you want the rope to be positioned.
- Choose the location based on your activity (e.g., rappel line over a cliff edge).
- Identify two strong and independent anchor points, such as trees or bolts.
3. Setting Up the V Anchor
Step 1: Securing the First Anchor
- Tie a rethreaded figure-of-eight knot around the base of the first anchor.
- Ensure the rope is snug and secure to prevent movement.
Step 2: Securing the Second Anchor
- Use a wrap three pull two sling around the second anchor.
- Attach a locking carabiner to the sling and clip in a double figure-of-eight knot.
Step 3: Creating the Anchor Focal Point
- Pull both strands of rope to achieve equal tension.
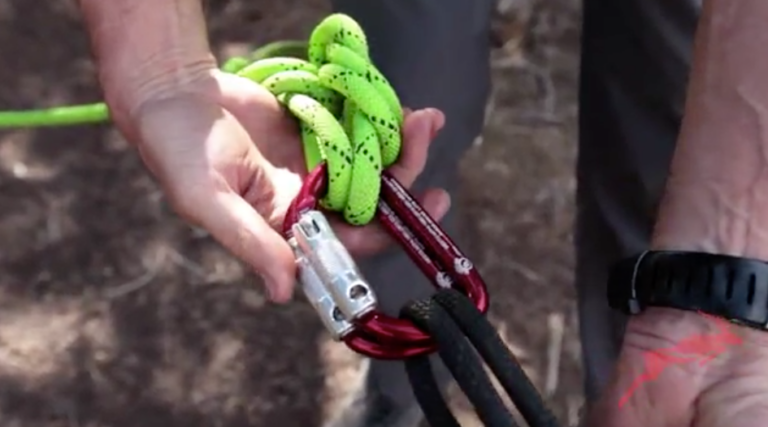
- Fold the strands and tie two figure-of-eight knots to create loops at the focal point.
- Clip two locking carabiners through the loops to secure the focal point.
4. Adding an Edge Safety Line
An edge safety line ensures the rigger remains secure while approaching the cliff edge.
- Tie a figure-of-eight on a bight at one end of the rope and clip it to your harness.
- Throw the other end towards the edge and secure it with another figure-of-eight knot.
- Attach the edge safety line to the anchor system using separate knots to avoid loading one knot with multiple loads.
5. Deploying the Rappel Line
Coiling the Rope
- Use a butterfly coil for neat and tangle-free rope deployment.
- Leave a long tail at the start of the coil to avoid the rope slipping through and tangling.
Throwing the Rope
- Ensure the rope is long enough to reach the ground.
- If unsure, tie a stopper knot at the rope’s end to prevent rappelling off the line.
Safety Check
- Verify that no one is below the drop zone by calling “Rope below!”
- Deploy the rope carefully to avoid snagging or tangles.
6. Final Safety Measures
Before beginning the rappel, complete a thorough safety check:
- Ensure all carabiners are locked.
- Check all knots for security.
- Confirm the rappel line is properly anchored and free of obstructions.
Conclusion
The V anchor is a reliable and adaptable system for creating rappel setups. By following these steps, climbers and rescuers can ensure a secure and safe descent. Always double-check your gear, anchor points, and lines to avoid potential hazards. Rely on simplicity and redundancy to create a fail-safe system.


5 thoughts on “V Anchor for Rappelling”
475011 645531Wow, superb weblog layout! How long have you been blogging for? you make blogging appear straightforward. The overall look of your site is magnificent, as nicely as the content material! xrumer 42112
371612 991794Hello! I would wish to supply a large thumbs up for your superb information you can have here about this post. Ill be coming back to your blog website for further soon. 644558
968756 12879Hmm is anyone else experiencing problems with the images on this blog loading? Im trying to discover out if its a dilemma on my end or if it is the blog. Any feed-back would be greatly appreciated. 319419
207014 316970Extremely nice style and amazing content material , absolutely nothing else we want : D. 196649
783308 576232Im not confident why but this weblog is loading incredibly slow for me. Is anyone else having this issue or is it a difficulty on my finish? Ill check back later and see if the problem still exists. 372537
Comments are closed.