Safe and Effective Use of Artificial High Directionals in Rope Rescue
Artificial high directionals (AHDs) have become essential in rope rescue, allowing teams to set up anchors in hard-to-reach places and overcome complex challenges. While these tools offer a range of configurations, each setup has unique strengths and limitations. Here’s a guide to maximizing the safety and effectiveness of AHDs, focusing on stability, load-bearing capabilities, and practical rigging techniques.
Getting Started: The Importance of Rigging Fundamentals
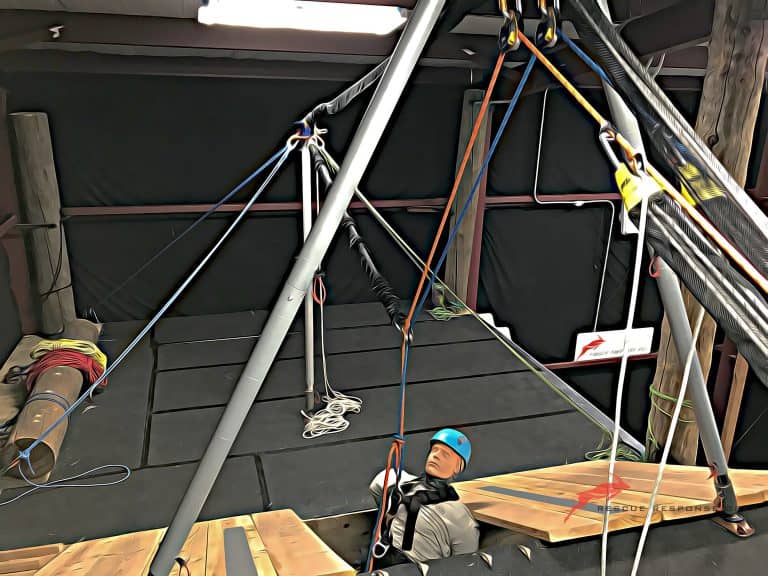
A successful AHD setup starts with solid rigging fundamentals. Choosing rigid connections—where joints are fixed and do not pivot—over pinned (pivoting) connections helps evenly distribute forces across the structure. This creates a more stable setup, particularly under heavy loads, and reduces the risk of stress or bending on any single leg. A strong foundation in hardware setup is key to maximizing the stability and performance of your AHD.
Understanding Cantilevered Setups
Cantilevering—a setup where one leg extends horizontally—can be beneficial for reach but must be handled with caution. The longer the cantilever, the weaker it becomes due to increased bending forces. Testing shows that shorter extensions are stronger and better resist deformation. When using a cantilevered setup, keep the extension as short as possible to maintain strength and stability.
Maximizing Stability with Multipod Configurations
When stability is a priority, multipod setups (such as tripods) offer significant advantages over monopods. Tripods distribute forces across three legs, while monopods rely on a single leg, making them inherently less stable, especially under heavy loads. Adding support tie-backs to multipod setups further enhances stability by redistributing load forces and reinforcing cantilevered legs.
The Rigid vs. Pinned Debate
One critical decision in AHD rigging is choosing between rigid and pinned configurations. Rigid setups—where joints do not pivot—distribute force across all legs, resulting in a more stable structure. Pinned setups allow pivoting, which can create points of weakness and reduce load-bearing capacity. For most applications, rigid connections are preferable as they provide greater safety and durability under stress.
Reinforcing Cantilevers with Tie-Backs
For configurations that involve extended cantilevers, adding a tie-back (a tensioned line to an adjacent leg) can significantly boost strength. Tie-backs redistribute load forces, providing critical support and preventing bending or deformation at longer extensions. While more complex, supported cantilevers are often the safest choice for high-stress applications, allowing for controlled reach without compromising the structure.
Knowing Your Load Limits
Every AHD setup has load ratings and strength limits. Testing has shown that rigid configurations consistently outperform pinned ones under high loads, and supported cantilevers are stronger than unsupported ones. Understanding the limits of each setup is essential to maintain safety—always stay within the specified load ratings, even when your configuration seems stable.
Artificial high directionals are powerful tools that allow for creative and flexible rigging solutions in rope rescue. By focusing on stability, keeping cantilevers short, reinforcing with tie-backs, and choosing rigid configurations, teams can set up AHDs safely and effectively. Respecting the equipment’s load limits and following best practices will ensure that these tools perform to their full potential while keeping rescue operations safe.
Here are some key articles on artificial high directionals (AHDs) from Rigging Lab Academy:
- Dynamic Directional Offset System Using an A-Frame and Natural High Directional
- Overview of using A-Frames with natural high directional setups, including benefits and limitations.
- Setting up the Improvised A-Frame and High Directional
- Guidance on positioning and load management when setting up A-Frames for rope rescue.
- Introduction to High Directional Setups and Systems – Part 1
- Part 1 of a foundational series on AHD configurations, benefits, and setup basics.
- Planning Your Artificial High Directional: What to Use and When
- Tips on selecting and planning the most effective AHD setup based on rescue scenarios.
Peace on your Days
Lance

